Pages

Showing posts with label Cooking. Show all posts

Tuesday, November 22, 2011

The Happy Accident That Turned Out Delicious!


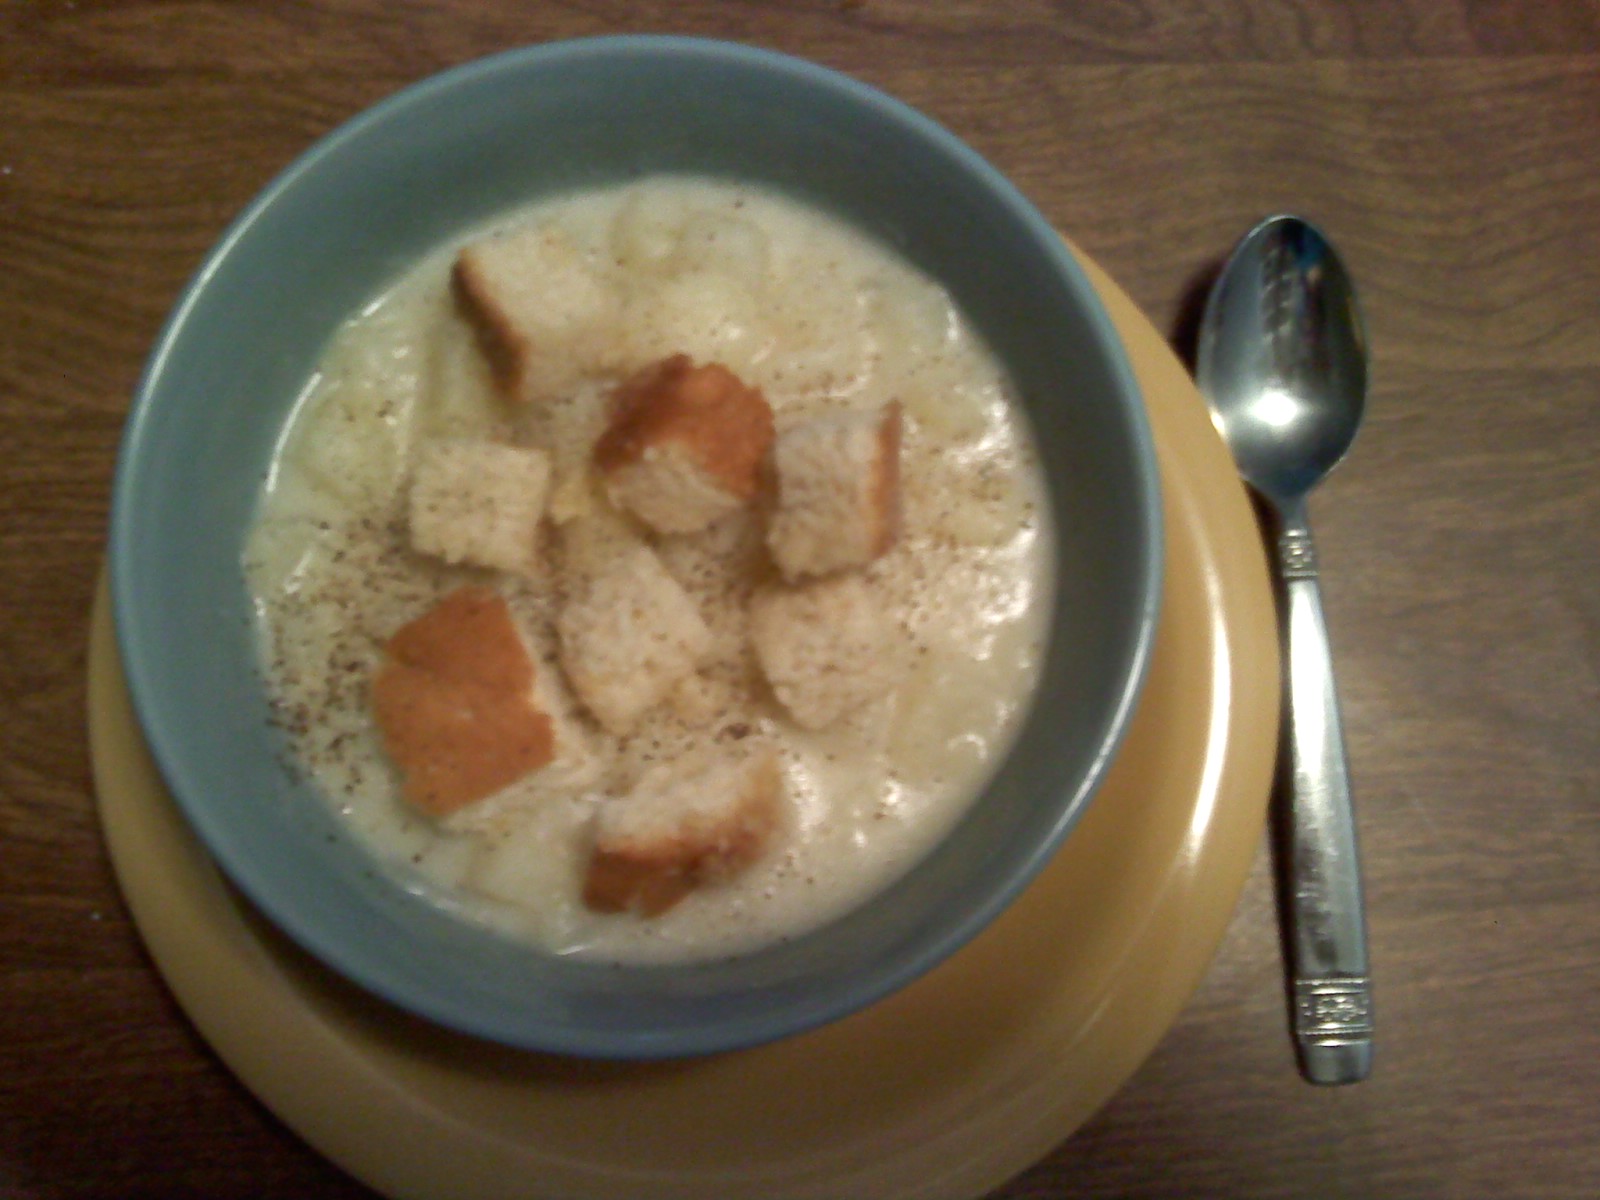
Last night I decided to try out a recipe I got from Giada at Home. I just love her and this sounded yummy and like something my family would enjoy. It was supposed to be Penne in Almond Sauce (I included the link so you can see original recipe). However, I miscalculated somewhere, had the wrong pasta and it turned out different than anticipated. The recipe calls for 2 cups of slivered almonds. Apparently, 2 cups of whole almonds is quite a bit more. The recipe also calls for 2 cups chicken broth. Instead of store bought, I used some that I had kept from another dinner and frozen. In hind sight, it occurs to me that mine was much thicker than the broth from a can. To clarify, the recipe instructs one to blend the broth, almonds, some garlic cloves and olive oil together. You are then to simmer this in a saute pan to thicken and reduce. What came out of my blender was already so thick that I nicknamed it almond hummus. I tried to thin it with some water as I heated it, but after adding the heavy cream, it was still so thick I had to ladle some out to make room to stir in the chicken. Also, I thought when I was shopping that I still had a box of penne at home. I was wrong, so last night I had to use spaghetti. What came out was what I will lovingly call Chicken Spaghetti in Almond Sauce. It was amazing! Even my picky two year old, who often survives on bird sized bites here and there, ate it up. So here's to accidents in the kitchen that result in yummy food, rather than small kitchen fires!

I would encourage you to try Giada's recipe, which we will try again, but if you're interested, here's my revised version:

Chicken Spaghetti with Almond Sauce
1 1/2 C. Almonds
3 Garlic Cloves
2 C. Chicken Broth (definitely use the store bought)
1/4 C. Extra Virgin Olive Oil
3/4 C. Heavy Cream
1/2 C. Water
1 lb Cooked Chicken, cut to bite size pieces
1 box Spaghetti
2 C. Parmesan, grated


Boil spaghetti according to directions. Puree the almonds, garlic, olive oil and chicken broth in a blender. Add water as needed. Heat over medium-high in a saute pan. Once heated through, reduce heat to medium and stir in the heavy cream and salt and pepper to taste. Add in chicken and heat until chicken warmed through. The original recipe called for peas as well, which sounds amazing but wouldn't have worked for my family. If you want to add in some frozen peas, add with the chicken. Once spaghetti is just cooked, drain and toss in 1 cup of the Parmesan. Toss pour on the almond sauce and toss to combine. Then add remaining Parmesan and toss. Serve quickly!

Monday, November 14, 2011

Love, Love, Love This Easy Ice Cream Recipe!

Too easy not to make it!

I was curious about making ice cream without an ice cream maker. So, I went to the library, meaning I Googled it. I knew there must be a way, and I'd seen different ideas on the Food Network, they were labor intensive, involving hours of scraping and hand churning. Well, I hit the jackpot! This blog, Kevin and Amanda.com, had the answer and it was only the third search result. I'll spare you the details and encourage you to read their blog, but I'll tell you of the two recipes I've tried so far. The basic recipe calls for one can Eagle brand sweetened condensed milk and one pint heavy whipping cream, whipped. The trick is to mix in any flavors or extras with the condensed milk, then fold in the whipped cream. Super easy! They have four different recipes on their blog, but I wanted to go for a family favorite, so first I tried mint chocolate chip. I put about a teaspoon of mint extract in with a roughly chopped chocolate bar. Then, after letting it freeze for a day, we all enjoyed it. I will warm you that the condensed milk has an almost nutty flavor, and I needed more mint to cover that.
So, for my next try, I crushed up 3/4 a package of whole Oreo sandwich cookies. I love getting bites of cookie, not just the flavor. This was perfect! It was delicious and cookie filled and a huge hit with everyone that tried it. The ice cream took on the flavor of the cream in the cookies and definitely disguised the Eagle brand taste. I'll warn you also that the recipe calls for at least 6 hours in the freezer, but it was my experience that both times it was better texturally and well frozen after a full day. Try it! You won't be sorry.

Wednesday, November 9, 2011

Family Favorite and Big Hit After Shelving Recipe For a Year

Pasta shells stuffed to the brim and drenched in Alfredo!
I pulled out an old favorite that my kids have been asking about for some time now. It is rare that they request anything but pizza or mac-n-cheese, so I do try to take them seriously when they want something real. I got the recipe from a magazine and tried it the way it was written the first time, three years ago. We decided it needed a lot of work, but wasn't worth abandoning altogether. So, after multiple variations, this is what we landed on, and what my picky children have asked for by name.

Stuffed Shells With Alfredo
1 Box of Pasta Shells (You can count out 20-22 shells, rather than cooking whole box, because I've only ever been able to fit up to 22 shells in a 9x13 baking dish)
5 Cans of Tuna or Salmon (use the pouches instead, to avoid any bones), drained
Handful of Chopped Cilantro
1/2 Red Onion, chopped
1 C Bread Crumbs
1 Lemon, juice of
1 Egg
1/2 C Shredded Mozzarella
1 Jar Prepared Alfredo Sauce (or your own home made, which is what we did this time)
Grated Parmesan

Preheat oven to 425 degrees.
Bring a pot of salted water to boil and cook the pasta, just to al dente. If it's too soft, then the shells tear and won't be easily stuffed. Once the pasta is cooked, drain the hot water and fill the pot with cool water. This will keep shells from sticking and drying out until you're ready for them. In a large bowl, combine the remaining ingredients, except for the Alfredo. Mix until well blended. Pour a bit of Alfredo into a greased 9x13 baking dish and spread around to coat. Using a large spoon, scoop the stuffing into a pasta shell and place in the baking dish. Continue stuffing shells until your pan is full. Pour remaining Alfredo over the top of the shells. Finish with grated Parmesan. Bake at 425 for approx 20 minutes, or until sauce is bubbly and the cheese has browned slightly.

This was a major hit with my husband and my children. Plus, after not making it for so long, they were bound to love it, but they said this was the best it's ever turned out!

Wednesday, October 26, 2011

Yummy Snack In A Hurry


Everyday I have to endure the same questions from my children. It's inevitable and not extraordinary in anyway, but there are days when I think I can't stand to hear the same questions even once more. They usually come in this order :

1. What's for breakfast?
2. What's for snack?
3. What's my daily chore?
4. Can I turn on the t.v.?
And the one that so stresses me out...
5. What's for dinner?

These are simple requests and when you have children who are still largely reliant upon you for everything, it isn't really their fault. The dinner question really only stresses me because we have some very picky people in this family, so most days I tell them they'll find out when it hits the table. Otherwise, I run the risk that by telling them, I get the slump of the shoulders and the eye roll if the menu doesn't meet their approval. I'm rather old-school, in that, I think we are to be thankful for everything provided and eat what's prepared. It doesn't mean I don't dread that reaction when they don't want what I've spent two hours making.
So, today we walked in after school and question number two popped up. Tomorrow is my big, twice a month shopping trip, so the pantry is desperately low on snack items. Much to my chagrin, so is the fruit drawer. When I realized there was nothing quick and available for the hungry bunch, I jumped on Supercook.com, where there is the handiest little tool called a recipe finder. You just type in your ingredients and it pulls up all the recipes that you could make. I entered brown sugar, milk, eggs, flour and peanut butter, hoping for some quick cookie or other item that I could throw together. I found an easy recipe for butterscotch pudding on AllRecipes.com. It turned out great and I end up with kid points for the day. I must say that usually I try to make healthier snacks, fruit and cheese, granola, yogurt, etc. In a pinch, though, I'm not above making something sweet just to get by until grocery day!
Here's the recipe:

Butterscotch Pudding
Ingredients:
  • 1 cup packed dark brown sugar
  • 4 tablespoons all-purpose flour
  • 2 eggs
  • 1/8 teaspoon salt
  • 2 cups milk
  • 1 teaspoon vanilla extract

Directions:

In a saucepan, combine sugar, flour, eggs, salt and milk. Cook over medium heat, stirring constantly, until mixture starts to bubble and thicken. Remove from heat. Blend in vanilla with hand beater. Pour into dessert cups and chill.

Friday, October 21, 2011

Deer Season And We Are So Excited!

Notice the darker red color of ground venison.

My husband loves to hunt and has many friends who, fellow hunter themselves, bless us with deer meat in various cuts. Because I didn't grow up eating it, I had to learn to prepare it. It turns out, it's not that different from other meat when it comes to cooking it. Yesterday we were blessed with four pounds of ground deer meat, so I thawed two pounds and we made deer burgers! It was really delicious and we felt good about eating healthy. If you aren't familiar with it, venison, or deer meat, is very lean and therefore a healthier choice than beef. I'm looking forward to Hubby bagging a deer this year and then we'll get to really explore the different cuts.
Anyway, it was chilly last night, so rather than making Rich fire up the grill, I made the burgers in a skillet. The key to burgers of any kind is not to overwork the meat when forming the burgers, and also never to smash the burgers while cooking. I know, its tempting. We are almost hard-wired into thinking that flat burgers are the way to go, since so many of us were probably raised eating a lot of fast food. However, making fat, juicy burgers is far more satisfying and they are more tender. Here's my recipe:

Served on homemade buns with bbq sauce and mayo, topped with cheese and grilled onions. Yummy!


Deer Burgers

2 lb Ground Venison
1/2 Medium Onion, chopped
2-3 Cloves Garlic, minced
1 Tsp Dried Oregano
1 Tsp Salt
1 Tsp Pepper
1 Tbsp Olive Oil

Gently work the meat and seasonings with your hands until well blended. Form your burgers gently, just molding the patties into shape, instead of rolling into balls and flattening. Heat skillet over medium-high heat. You may lower just a touch, if the burgers seem to be cooking to fast on the outside. I like to turn my patties frequently, to get even heating throughout as well as good color on the outside. In between turns, I keep a lid on to trap the heat in. You know they're finished when you can pierce the burger with a fork and the juice is clear, not bloody. Don't over cook, though. Garnish with cheese and your favorite veggies. I served mine on home made buns using the Amish White Bread recipe. I adjusted the baking time, though, since it was buns not whole loaves.

Wednesday, October 5, 2011

Alfredo Sauce Is Not So Scary When You Cheat!


If you've read my blog, you know that I had to learn how to make "The Sauce" (Italians call it by several names, including marinara, gravy, etc.) when I got married. My husband was raised with traditional Italian food and home made everything. By his admission, I've mastered the tomato based variety of Italian sauce, but I use to by a little intimidated by Alfredo sauce. It contain lots of expensive ingredients and if you mess it up, either scorch it or curdle it, you have to throw it out. I've made it the old fashioned way once or twice, but it was labor intensive and had to be timed just right with the rest of the meal.
Then, I learned to make Bechamel sauce. It's basically a white sauce that is used in lasagnas and other pasta dishes, or over vegetables. The thing about Bechamel, it's the perfect base for Alfredo! So, instead of buying heavy cream, that I won't be able to use up before it expires, I've learned to make Alfredo with 2% milk and no stress! Here's the recipe, but don't tell anyone where you found it, because I pass it off without anyone knowing the difference!

Easy Alfredo Sauce

5 Tbsp Butter
4 Tbsp Flour
2 C. Whole or 2% Milk
1 Clove Garlic, Minced
1 to 1 1/2 C. Shredded Italian Cheese (I have used the store blend, or any combination of mozzarella, Parmesan, Romano and Asiago, depending on what's in my fridge)
Salt and pepper to taste (I say this because in my house, there's no such thing as too much pepper)

Start by melting the butter in a sauce pan over med-high heat. You should keep a small whisk handy to stir, and to avoid your butter burning. When the butter just starts to bubble, start whisking in the flour, one tablespoon at a time, until you have a roux, or a thick, creamy looking mixture. Add in the milk and bring to boil. You need to babysit the pan, because with milk, there is always a chance of boiling over. The reason you need to bring it to a boil is to help cook out the flour and starch taste before adding your cheeses. Reduce the heat to just below medium, stirring the sauce almost constantly. You'll notice it thickening up. Once you have allowed the sauce to cool a bit, enough that it is no longer bubbling, you can gradually add your cheeses. The important part here is that if the sauce is too hot, your cheese will curdle and leave hard little lumps instead of melting smoothly. You should whisk slowly, keeping the cheese moving in the sauce as it melts. Add in your garlic, salt and pepper and continue to cook until the flavors are well blended. You will want to test several spoonfuls until it is how you like it. For a less intense garlic flavor, you can add the garlic clove, cut in half, with the milk, then fish it out at the end. I like to throw in one more tablespoon of butter right at the end, just for an extra silky texture. Serve on your favorite pasta!

Wednesday, September 21, 2011

A New Twist On An Old Favorite


My husband was in the mood for chili, but I didn't have any ground beef or corn chips (in our house, chili really means Frito Pie). So, I decided to try my hand at white chicken chili. I had been wanting to try this for awhile anyway. I have an over-abundance of chicken on hand, because we buy it 20-lb at a time. I started with some olive oil and butter in my dutch oven, over med-high heat. I rough cut the chicken down to bite size pieces, but I refuse to cube it, since cubed chicken has always kind of grossed me out. It seemed unnatural and makes me think of processed meat. Anyway, I tossed the chicken in some oregano, garlic powder, cumin, ground red pepper, salt and black pepper. Then I browned it in the oil and butter, just cooking it for about 5 minutes or so, then flipping it to cook on other side, until just cooked and golden brown. I then removed the chicken from the pan, using a slotted spoon, and kept it in a covered bowl so it didn't cool off too much. I threw in chopped purple onion, chopped cilantro and the rest of my seasoning mix, which consists of the same seasoning I used on the chicken. Once the onions and garlic had softened, I whisked in about 4 tbsp of flour to create a roux (this is a thick base for soup, sauce or gravy).  I added in chicken broth, brought it to a boil then reduced to simmer for about 30 minutes, covered. Now, as you know if you've read my blog before, I don't like boring, one-color meals. So, even though the name of this dish is white chicken chili, I have to spice it up and make it pretty. After my chili had reduced and thickened up, I threw in a can of black beans and a can of corn, along with the cooked chicken and more chopped cilantro. This made it much more interesting. After it cooked a bit longer, to make sure everything was warmed through, it was ready to serve. I fill bowls with blue corn chips, topped with chili and finished with shredded Colby jack cheese. Voila! New twist on an old favorite. Here's the actual recipe.

White Chicken Chili

3lb Chicken Breast, cut to bite size pieces
3 tbsp Olive Oil
2 tbsp Butter
1/2 Medium Red Onion, chopped
4 tbsp Flour
4 c. Chicken Broth
1 can Corn
1 can Black Beans
2 Handfuls Fresh Cilantro (roughly 2 tsp once chopped)

Seasoning Mix:
1 tsp Garlic Salt
2 tsp Garlic Powder
2 tsp Ground Cumin
1 tsp Dried Oregano Leaves
1/2 tsp Ground Red

In a dutch oven or 4 qt pot, heat oil and butter over med-high heat. Toss the chicken in 1 tbsp of the seasoning mix. Add to the pot and brown, cooking for about 10 minutes, turning half way through. Once chicken is cooked through, remove from the pot using slotted spoon. Place chicken in a bowl and cover to keep warm. To the pot, add chopped onion, half the cilantro and the remainder of your seasoning mix. Cook until your onions soften, then whisk in the flour, sprinkling it in a little at a time to avoid lumps. Let it bubble a bit longer, whisking the whole time, then add in your chicken broth. Bring to a boil, then reduce to a simmer and cover, for about 30 minutes. Add in your chicken, corn, beans and cilantro and cook for another 15 minutes, stirring occasionally, to warm through.

Serve with chips and cheese.
Makes apprx 6 servings.  

Monday, September 12, 2011

Standing In The Pantry Doorway & Feeling Adventurous


So, I was looking in my pantry on Sunday morning, considering breakfast options. I like to make something fun on Sundays, since I usually have enough time and we have breakfast late, so we won't be ravenous after church. This particular Sunday, I was feeling very rough, suffering with a sinus infection, so while I wanted to try something fun, I didn't have a lot of energy to devote to a big production. Then, something caught my eye: a box of instant chocolate pudding. The wheels started turning and I thought, I wonder what would happen if I put that in my pancakes. I said a little prayer and got to work. I had a basic pancake recipe, but was low on milk. So I had to use water, and I just added it gradually until I got the right consistency. I also threw in some instant oatmeal, so it would still be breakfast and not just dessert.
I tasted the batter and dove in. I made four silver dollar pancakes to start. I tried one and let the kids try one. We decided it needed something else. I threw in some extra sugar and a tablespoon of cocoa powder, because the chocolate seemed a little dull once cooked on the griddle. That was the key. The chocolate pudding itself tastes rich and chocolaty, but part of that is texture. Once cooked into my pancake batter, it was almost too mild. The next round of pancakes was perfect! They are more dense than traditional pancakes, but yummy and moist. We didn't need any syrup, just a pat of butter. The neat thing about the instant oatmeal is that it doesn't effect the texture much. The kids didn't even know I'd put it in until I told them. Here's the final recipe, but feel free to take it and make it your own. I think next time I'll try butterscotch pudding and add the little butterscotch chips!

Chocolate Pudding & Oatmeal Pancakes

2 C. A.P. Flour
2 1/2 Tsp Baking Powder
5 Tbsp Sugar
1 Tbsp Cocoa Powder
1/2 Tsp Salt
2 Eggs
1 Tsp Vanilla Extract
1 Box Instant Chocolate Pudding
1 C. Quick Cook Oatmeal
2 1/2 C. Water (Started with 1 1/2 and added more until I reached the desired consistency)

Mix all dry ingredients first. Whisk wet ingredients in separate bowl, then slowly incorporate into dry mixture. Heat griddle over medium-high and make some cakes!

Friday, September 9, 2011

Ode To The Potato...How I Love Thee In Any Form


I realize there may appear to be a theme lately. Whether it's my Irish roots or just more cravings, I love potatoes. I could eat them with every meal. I remember that last time I was pregnant, I made a hash brown casserole, one of my favorite holiday potluck dishes. My picky family didn't really care to eat this more than once, so over the course of four days, I took care of most of it myself. The next week, I made a large pot of the potato soup from yesterday and lived on that for a few days. Now, this may serve as evidence that I just crave starch when I've got a bun in the oven. Either way, can't get enough of it. So, I'm whipping up this cheesy hash brown casserole and I won't even feel bad if I'm the only one eating it! Here's the recipe:

      Cheesy Hash Brown Casserole
  • 1 (2 pound) package frozen hash brown potatoes, thawed
  • 1/2 cup melted butter
  • 1 (10.75 ounce) can condensed cream of chicken soup
  • 1 (8 ounce) container sour cream
  • 1/2 cup chopped onions
  • 2 cups shredded Cheddar cheese
  • 1 teaspoon salt
  • 1/4 teaspoon ground black pepper
  • 2 cups crushed cornflakes cereal
  • 1/4 cup melted butter
Preheat oven to 350 degrees. In a large bowl, combine hash browns, 1/2 cup melted butter, cream of chicken soup, sour cream, chopped onion, Cheddar cheese, salt and pepper. Place mixture in a 3 quart casserole dish. Pour the crushed corn flakes over the mixture, covering everything to the edges of the dish. Pour the 1/4 cup melted butter over the corn flakes. Bake covered in preheated oven for 45 minutes, or until corn flakes are golden brown and cheese is bubbling.

Thursday, September 8, 2011

The Smell Of My Favorite Comfort Food Filling The House


Growing up, my grandmother and my mom both made this wonderful soup that I've never found anywhere else. Potato soup! Now, before you ask the address of the rock beneath which I must have lived all my life, let me explain. I know they didn't invent the concept. I've had potato soup elsewhere and from a can. I would almost qualify all those other versions as chowders. Anytime I have had opportunity to eat potato soup, not made by my mom, it was very thick and often dressed up with bacon bits or cheese. Not that there's anything wrong with that.
The soup I grew up on was thin and delicious! It was basically boiling boiling potatoes with onion, much like preparing to make mashed potatoes. Then, once they're cooked, you drain the water, add milk and a whole lot of butter, salt and pepper. Bring just to boil, then its done! We always crumbled saltine crackers into the bowl with the soup and it made this starchy mush that was "to die for!" It probably sounds strange to someone who's never had it this way. I wouldn't have it any other way.
I do like to tweak things and dress them up a bit, though. I'm also almost morally opposed to serving a meal that's all one color. The answer to this is, of course, garnish. So, today, I'm while I'm typing this, I'm smelling the wonderful potato/onion combo on the stove top. However, we don't keep saltines in the pantry, so I've decided to make croutons from my home made bread. I just melted some butter, cubed a big chunk of bread, tossed in it the butter. Then I put this in the oven on a baking sheet, preheated to 250, and turned the oven off. The croutons will be prefect by the time my soup is ready.
Now, for those of you that never leave for a road trip without a map and never attempt a meal without a recipe, I hear you. Here's an actual recipe:

Potato Soup
3-4 Medium Potatoes, Peeled, Chopped to Bite-size
1/2 Medium Onion, Chopped
Appx. 1 1/2 C. Milk
4 Tbsp Butter
Salt and Pepper to taste (I will remind you that potatoes are the black hole of seasoning and you will need to apply liberally)

In a 3-4 qt pot, boil the chopped potatoes and onion, until potatoes are fork-tender. Drain the water, pour in the milk and the butter. You just need enough milk to cover your veggies. Heat until it just starts to bubble. Turn off the heat and stir in your salt and pepper. You can always substitute the onion with scallions. Its a sharper taste and will break the all white rule so you won't feel so monochromatic.  This makes appx. 4 servings. Enjoy!

Thursday, August 11, 2011

Midnight Meringues and Mixing in the Laundry Room


The other night I was awake and craving something sweet. My husband was at work and my youngest had fallen asleep on the couch (he's not feeling well), so I was on my own. I thought about meringue cookies and decided that was just the thing. I didn't want to wake anyone, though, so I took my hand mixer into the laundry room. Then, using the washing machine as my counter top, I whipped up some very pretty, opalescent, stiff egg whites. I had a sense of the ridiculous and giggled a bit, but that made it even more fun. Now, my favorite meringue cookies are mint cocoa, but I was out of cocoa and chocolate chips. The only chocolate in the house was a little bottle of chocolate sprinkles. Done! I put my peppermint extract in and then, as a finishing touch, I dotted the little dollops of meringue with chocolate sprinkles. The result was delicious and subtle. I'll warn you, though, that midnight meringues are not for the faint of heart or the must-have-it-nows. It takes at least an hour in the oven, so it is a commitment. Totally worth it! Here's my recipe. You can add in any flavor or food coloring. These are fun at Easter with pastels.

Meringue Cookies
2 Egg Whites
3/4 C. White Sugar
1/8 Tsp Salt
1/8 Tsp Cream of Tartar
1 Tsp Vanilla Extract
Optional:
1/2 Tsp Peppermint Extract
1/2 C. Unsweetened Cocoa Powder
1/2 C. Mini Chocolate Chips
1/4 Tsp Food Coloring
Colored Sugar
Nonpareils

Preheat oven to 275 degrees. It a mixing bowl, whisk egg whites, salt and cream of tartar until eggs are light and frothy. Now you need the mixer. Starting on low speed, mix the egg whites and slowly add in the sugar. Once you have incorporated all your sugar, you can add the vanilla and any other flavors. Increase your mixer speed to medium and continue mixing for several minutes. You'll notice that the mixture starts to look creamy and thickens up. It will also double in size before you are finished. It takes a good 10 minutes before you get stiff peaks, meaning that when you turn off the mixer and pull it out of the bowl, the meringue stretches and streams behind, leaving little peaks. If you want to add cocoa powder or chips, gently fold them in with a spatula. Line a cookie sheet with parchment paper. Using a teaspoon, drop little, imperfect dollops of meringue on the cookie sheet. For the more advanced you can put the meringue in a pastry bag and pipe onto the cookie sheet with a decorative tip. These are whimsical and cute, so don't obsess about making them round or even. Top off with any sprinkles and put in the oven for at least 45 minutes. I usually turn my oven off after that and leave them in for another 15 minutes. Allow to cool completely, or they will come apart when you remove from the cookie sheet. Enjoy!

Tuesday, August 9, 2011

A Tisket, a Tasket, I Made My First Brisket!


We are a brisket loving family. So, when I got a 6lb brisket on sale, I was all about it. One problem, though: I've never made brisket! My husband really wanted to smoke it, but we didn't have enough wood. Not to be discouraged, I just jumped on All Recipes and looked up brisket. I found very easy directions for roasting it. I already knew that the trick was cooking it low and slow, meaning low temperature and long cooking time.
So, Sunday morning, I pulled my prize meat (roughly the size of a newborn baby) out of the fridge and attacked it. I started off by trimming away most of the fat, then made slices across the grain. This way any fat left didn't shrink during cooking. Then I took a bowl of black pepper and seasoned salt and used my hands to rub the mix all over both sides. Finally, I minced two cloves of garlic and rubbed it onto the exposed side. I poured about a cup of water into my roasting pan with the brisket. Then I put the lid on, put it in the oven at 275 degrees and got ready to go to church. By the time we got home, the timer I'd set to 4 hours had only 30 minutes left. The house smelled amazing and I had just enough time to boil potatoes for mashing. We had a beautiful, tender, juicy brisket for a late lunch and then snacked on it for the rest of the evening. Then Monday, we had brisket sandwiches. We plan on smoking it next time, just to experiment, but this was no disappointment for a first timer!

Friday, August 5, 2011

The Proper Way to Melt Cheese (Yeah There's a Wrong Way)

Back story: my husband comes from a very Italian family. While I have an Irish heritage, my mother was a single parent for many years, so our spaghetti came from a box and the sauce from a jar. After I got married, it didn't take long for me to realize I had to learn a few things in the kitchen. So, by now I have mastered making what we affectionately refer to as "the sauce," or a good, from scratch marinara sauce. I also learned to make Bechamel and Alfredo and I've learned how to make my own pasta dough. So, I was feeling pretty confident when I decided to try my hand at home made mac-n-cheese.
Oops! If you have made cheese sauce from anything but Velveeta, you already know what I'm about to say. I took some milk, butter, salt and pepper, heated it up and threw in some cheese. After whisking furiously for 15 minutes, my cheese was not melting, but separating and hard. At this point I used my favorite kitchen tool: GOOGLE. I found a very helpful article on All Recipes about how to make cheese sauce.
Immediately I discovered my first mistake, which was too much heat. Also, I knew I needed a starch to thicken the sauce, but I should have had that incorporated before adding the cheese. So, refusing to call it a loss and waste everything, I cut a bit of cheese cloth (which was a mystery to me until recently, I found it in the fabric department) and used it to strain out the curdled cheese. By that I mean, lined a bowl with the cheese cloth, poured the sauce in, the gathered the cheese cloth and squeezed out the liquid. Then I threw the liquid back into my pan and brought it to a medium heat, lightly bubbling, so i could whisk in a bit of flour. Then I lowered the heat to low-med and added the cheese. Another tip from the article was to sprinkle a bit of an acid, like lemon juice, on the cheese before melting, to keep it from getting stringy. This worked very well. So, after a small bump in the road, we ate home made macaroni and cheese for lunch.

Monday, August 1, 2011

Plumbing Issues and Peanut Butter Oatmeal Pancakes


Last night, while preparing dinner, a strange thing happened. Foul smelling water came into both side of my sink, from the drain. I ran the disposal and it went away, but as soon as I turned it off, the swamp water returned. Ewww! Today, my husband and I both tried our hand at plumbing. About an hour into this, we threw in the towel and decided to leave it to the professionals. So, I had to get creative for lunch because, while waiting the professional, my sink was in pieces. I went for something fun and filling, although I may not win Mother of the Year for it. I took a standard pancake recipe and threw in some melted peanut butter and a cup of quick cook oats. What came out was delicious and my kids ate it up, with no syrup! I've actually never had a habit of buying syrup because I showed the kids long ago that a yummy pancake with the right extras in it, and a pat of butter on top, tasted great without any extra sugar. Of course, they still love syrup when its available, but I never get any complaints without it.
You can try this or leave out the peanut butter and throw in your own twist, like a mashed up banana or sliced up apples.

Peanut Butter Oatmeal Pancakes
2 c. All Purpose Flour
2 1/2 tsp Baking Powder
1/2 tsp Salt
5 tbsp Sugar
1 tsp Vanilla
1 1/2 c. Milk
2 Eggs
2 tbsp Melted Butter
3 Heaping tbsp Melted Peanut Butter
1 c. Quick Cooking Oats

Mix your dry ingredients first, then whisk in the wet ingredients. It will be thick and you may thin it out slightly by adding a tbsp of water at a time until just right. Heat a skillet or griddle over med-high and spray with cooking oil. Laddle batter into the skillet, wait for it to bubble and brown around the edges, then flip. We enjoyed these with a little butter on top. If you really want to get crazy, powdered sugar is nice, too.


Thursday, July 28, 2011

Smaller is Better and Channeling Aunt Wanda

In America, the need for everything to be the biggest and best is ridiculously out of control. And I have discovered that, in many cases, bigger is not better. It starts with babies; they are the most beautiful creatures on earth, whether human or animal. And look how little they are! This rule also applies in the kitchen. I realized, really by accident, that little food is not only cuter and more appealing, but it also gives a feeling of contentment not easily found with larger foods.
I'll explain... It started a few years ago when I used to make 'Doggies in Blankets' (we started calling them this when my then three years old thought it sounded funny calling hot dogs piggies). I used to grab a package of eight hot dogs and a can of biscuits and make eight doggies. My three year old daughter and two year old son could demolish three or four of these doggies each, in one sitting. One day, on a whim, I cut each hot dog into three pieces and then then same with the biscuits and made a whopping 24 'Pups in Blankets.' Imagine my shock when my children, after eating only five of these pups (less than two whole hot dogs) were full and happy. Awesome!! So, now I've tried it with  hamburgers and taco pies. Last night I made cheese burgers sliders. I used one pound of hamburger and made the little buns with my white bread recipe (see Recipes). Absolute hit! Plus my whole family of five were full and satisfied on just 12 mini cheese burgers. When I make standard size hamburgers on the grill, my husband alone can eat two or sometimes three whole hamburgers. That meal usually requires two pounds of meat. So not only am I saving money by making everything smaller, but my family does even notice they are eating less.
I'll also share another secret with you. I started putting dinner on salad plates, instead of using the full size dinner plates. Martha Stewart would probably be astounded at this table setting, but my family is fine with it. I have a great aunt that said she used to feed a family of four on one package of hot dogs a week. Aunt Wanda, I don't know how you managed, but I think I'm starting to figure out at least some of your secrets!

Wednesday, July 27, 2011

Breakfast Boredom Rescued By Last Night's Dinner


We have been up at 5:30 am for the past three mornings, taking my husband to work. It's a temporary problem but still exhausting for the whole family. So, we come home half zombie and half starving. I have been trying to spice up breakfast to compensate for the fatigue and this morning, thanks to my mother-in-law, I hit one out of the park with some left over mashed potatoes. We are a potato loving family and I have often made my "Poor Mans Hash Brown" by just roughly chopping and frying potatoes for breakfast. However, during a recent visit, my mother-in-law told me about making potato cakes from mashed potatoes. I got really excited to try it. I had to look up the recipe and then, of course, I had to tweak it and make it my own. Here's what I came up with:

Mashed Potato Cakes

2 C. Mashed Potatoes (roughly)
1 Egg, well beaten
1/2 C. Flour (plus another cup for breading)
Salt and Pepper
1/2 Stick Butter
Vegetable Oil
2 C. Shredded Cheddar (or your favorite cheese)

In a bowl, mix your potatoes, egg, flour and cheese. In a separate bowl, stir 1 c. flour with 1 tsp salt and 1 tsp pepper for the coating. Take a large spoon and scoop the potato mix, form a ball with your fingers and then roll in the flour. Once coated in flour, you can flatten into 1/4 inch cake and place on a plate. Repeat until your have formed appx 8 cakes. It will be easier to cook these if your refrigerate for about half an hour. Heat a frying pan over med to high high. Coat the pan with veg. oil and melt about 2 tbsp of butter with it. Your don't want to use all the butter at once because it will burn and the cakes soak up a lot.  Place fry the cakes 3 at a time so you don't over crowd your pan. Cook for about 10 minutes on each side, or until golden brown. Add more butter as you need it. Set them aside to cool for about 10 minutes. They will be super hot!

So, next time you have mashed potatoes left over from dinner, don't throw them out! Put them in the fridge and you know they'll get used up at breakfast. Plus, you know this is a budget-friendly way to make your potatoes stretch a bit further.

Monday, July 25, 2011

Kid Food, Banana Peppers and A Dash of Wasabi

In my efforts as a stay at home Mom, I've discovered that summer lunches are more of a challenge. I have three children, with another one on the way, but my two oldest are in school. So, during school I tended to throw something together for my two year old and it was simple and easy. Then I would make something for my lunch when he was napping. When I have all three of them, lunch takes more effort and I often opt out of a separate meal and either skip lunch or eat kid food. I've gotten creative, though, because sometimes kid food is not so appetizing. The pregnancy cravings are probably giving me inspiration, as well. Today, I sliced up apple, and cooked some chicken nuggets. Boring! I decided for my plate, I would spice it up and made some wasabi-mayo for dipping sauce. It sounded good and tasted really good! I took some prepared wasabi paste and threw about 1/2 tsp in with 2 tbsp of mayo. It may have been more. I tasted it and kept adding the wasabi. If you are squeamish about spice you should probably add it gradually, to taste. I think next time I'll even get crazier and put my nuggets on a sandwich. I've also recently chopped banana peppers and put them in my mac-n-cheese. It was awesome, but I leave this to your discretion as to whether it was a craving or a stroke of genius.

Thursday, July 21, 2011

Desperate Housewives and the Sliced Bread Affair

  Part of my experiment at home, actually a large part, involves the kitchen. I have been making my own pasta, tortillas and bread in an effort to cut out preservatives and artificial junk at every opportunity. It also saves money. There is something to be said, though, for the ready sliced, sandwich size bread that you can grab at the store.  So, here are some facts, for those of you who like trivia (for the rest of you just hang in for a paragraph because I'm going somewhere with this). While it was in the works by 1928, Wonder Bread first marketed sliced bread nation wide in 1930.[1] This new-found convenience quickly became part of the average household, so when the U.S. government imposed a short ban on selling sliced bread in January of 1943, it left many housewives in a bind. This letter from a very frazzled home maker appeared in The New York Times not quite a week after the ban.
   "I should like to let you know how important sliced bread is to the morale and saneness of a household. My husband and four children are all in a rush during and after breakfast. Without ready-sliced bread I must do the slicing for toast—two pieces for each one—that's ten. For their lunches I must cut by hand at least twenty slices, for two sandwiches apiece. Afterward I make my own toast. Twenty-two slices of bread to be cut in a hurry!"[2]
  I found this hilarious! Don't worry, though, because while the ban was an effort to save on packaging cost during WWII, it lasted for a brief three months. I will tell you that, after making all our bread for awhile now, it does take more time cutting each slice as you need it. A warning, though, to anyone prepared to try this at home... I learned the hard way that home made bread is better stored whole, since it has no preservatives or conditioners and will dry out quickly if sliced. Now, having said that, if you are ready to forge ahead, I will gladly include the first recipe I tried and that we have come to love.
  Yummy White Bread
1/4 C. Milk
1 1/2 Tbsp Sugar
1 Tsp Salt
1 1/2 Tbsp Melted Butter
1 Pkg Rapid Rise Active Yeast
2 1/2 to 3 1/2 C. All Purpose Flour
  Start with a large mixing bowl and yeast. Add enough very warm water, usually 1/2 c. or so, and whisk until well blended. Whisk in salt, sugar, milk and melted butter. Stir in 2 cups of flour to start. Keep working flour in until it get too sticky, then you get your hands dirty. Work the flour in and knead until it starts to feel smooth and no longer sticks to your hands or the bowl. Turn out onto a clean and lightly floured surface and knead for about 10 minutes. For the true amateur (like I was) kneading is like mashing and twisting the dough. Now place it in clean bowl and cover with clean towel. It needs to rise for at least an hour, in a draft free area. Warmer is better. I put mine atop the fridge. After an hour, turn out and literally punch down the dough. This lets the air out and you can now roll it out with a rolling pin. Once you've rolled out any air bubble, you can make a loaf by rolling the dough up (like you would roll up a poster only tighter) and pinching the ends together. Tuck the ends under to make a neat little loaf. Place in a greased loaf pan and let rise for another hour. The dough should be over the top of the pan and ready to bake. Bake at 400 degrees for appx 30 minutes. Since ovens vary, start checking it at 25 minutes. You're looking for a golden top and it should sound hollow if tapped with a wooden spoon. Let cool completely before storing.

Notes:
1.http://www.holsum.com/history.shtml
2.http://select.nytimes.com/gst/abstract.html?res=FA0D15F63D59147B93C4AB178AD85F478485F9

Wednesday, July 20, 2011

2 Chicken Breasts & The Magic of Thanksgiving in July

So, today is lean Wednesday... It's the last day of my two week grocery budget and I always have to get creative for dinner. It seems that no matter how much planning I put into it, the pantry gets low by the 14th day. I've got two lonely chicken breasts left in the freezer and I have 3 children and a husband to feed. Time for the magic noodles! I don't know if everyone does this, but in our family, at least since my great grandmother's day, at Thanksgiving and Christmas, we had turkey, mashed potatoes, and "the noodles." That's not all, of course, but those were the staples and base for the whole meal. It's been tradition to make these egg noodles and boil them in turkey broth, salt and pepper. The broth thickens up and you have a delicious and hearty starch-fest that is soul-warming and delicious! I've discovered, though, that if you throw in some chicken breast, it can be a meal unto itself. Now we are on our way to the grocery store for one dozen eggs, because that is all I lack to start this magic meal. And the best part is, I'm going to share this recipe with you. Its one of the cheapest meals you can make and its always a crowd pleaser at my house. For the less picky family, you can always throw in some peas, carrots, celery, etc. to make it a more rounded meal.
Here's what you'll need:
Home Made Chicken and Noodles
A large mixing bowl.
3 Egg Yolks
1 Whole Egg
1 Tsp Salt
3 Tbsp Cold Water(use more as needed)
2 C. Sifted All Purpose Flour


Whisk your egg yolk, egg, salt and water until light and well incorporated. Slowly add in flour and stir until too thick, then knead with your hands. It should be not too sticky, but smooth and well combined. Your should knead for about 5 to 10 minutes until your reach the right consistency. Then wrap in plastic for a few minutes and let it rest. It will be easier to work once it has rested. Flour a large surface and turn dough out. It is easier to work with in smaller batches so you can divide it in two and roll it out separately. Keeping it well floured, roll out the dough until its appx. 1/16 an inch thick. Sprinkle flour over it, then roll it up, like a jelly roll, as tightly as you can. Using a sharp knife, cut the roll into equal(eyeball it, doesn't have to be perfect) slices, about 1/8 inch each. If you divided the dough, repeat the roll and slice steps until all the dough has been cut. Now unravel the noodles on well floured surface and allow to dry. If your aren't cooking the same day, then you should let them dry out all day and then freeze in a freezer bag until you plan to use them.
<><>
Today's batch laying out to dry.

Now if you are making chicken and noodles, here's the rest of the story:
In a dutch oven (or 5qt pot) coat the bottom of pan with veg. oil and heat over med-high. Salt and pepper both sides of 2-3 boneless, skinless chicken breast. If bone-in is all you have, this of course works also, just an extra step of de-boning. Place the chicken breast in the pot and cook for a few minutes on each side, just enough to brown the outside of the breast. Once the chicken is browned, add enough water to cover the chicken. Throw in chopped onion or garlic to flavor the chicken. Bring to boil, then reduce to medium heat and simmer covered for appx. 30-45 minutes, or until the chicken is fork tender and easy to pull apart. Remove the chicken to a plate. You will need to add enough water to the pot to boil your noodles, so judge for your self. Bring to a boil and add the noodles. Because the noodles are thick, it may take about 20 minutes to cook. Just stir occasionally to make sure they don't stick to the bottom and burn. While noodles are cooking, shred the chicken into bite size pieces. Once the noodles are tender, cut one just to make sure they've cooked through. You are looking for any white in the middle of noodle. If no white, then you're good. The stock will thicken naturally during the cooking process because of all the flour and starch. Once thickened, throw the chicken back in, salt and pepper to taste.
I've replaced my finished picture with this far more appetizing one that my little sister took.
She went home after I showed her how I made it and did it herself!

I hope this was clear and easy to understand and that your family will enjoy it like mine does!